I seem to be on a pillow making run these days! Must be the season. My house can use some refreshing, and the holidays are always the perfect time for that. I was really excited to be invited to join 18 other bloggers as we share how easy it is to make a pillow with a variety of skill levels and designs. A special THANK YOU to OnlineFabricStore for sponsoring this tour and providing the fabric and pillow insert for all of our pillow projects.
For this pillow, I wanted to venture away from the patchwork look and try something different. When I saw this Richloom Birdwatcher Meadow home decor fabric, I knew exactly what I wanted to do. This easy DIY pillow tutorial will have you making a pillow of your own in no time.
Are you ready? Let’s get started!

Materials Needed …
- 16x16in. Pillow Form
- Richloom Birdwatcher Meadow Fabric … 1 yard
- A piece of felt wool or fleece or flannel larger than your applique piece
- Double-sided fusible interfacing
- Solid fabric for lining
- Blue masking tape
- Batting
- Sewing Machine
- Rotary cutter and mat
- Scissors
- Thread … both white/cream and either dark brown or black
- Straight Pins and Safety Pins
- Iron
Step-by-step Instructions …
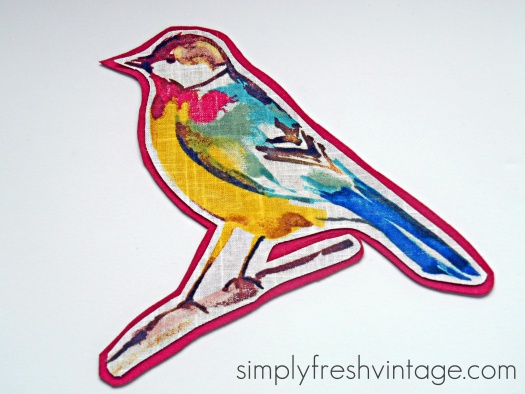
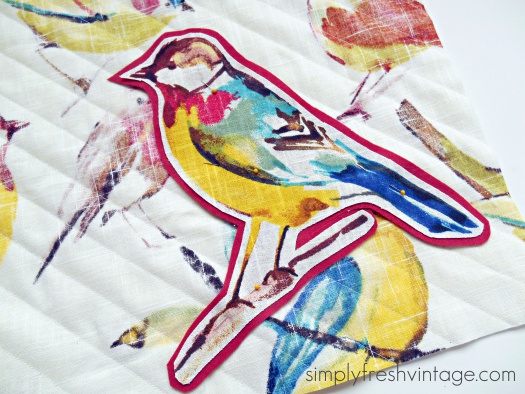
1. Find a bird that you want to use as your focal point.

2. Carefully cut it out, leaving about 1/4″ to 3/8″ outline around it.

3. Cut out a few pieces of double sided fusible interfacing and iron to the back side of the bird applique.

4. Remove the paper from the fusible interfacing, turn the applique right side up, and iron onto your wool felt. Trim the wool felt, leaving another 1/4″ to 3/8″ border.
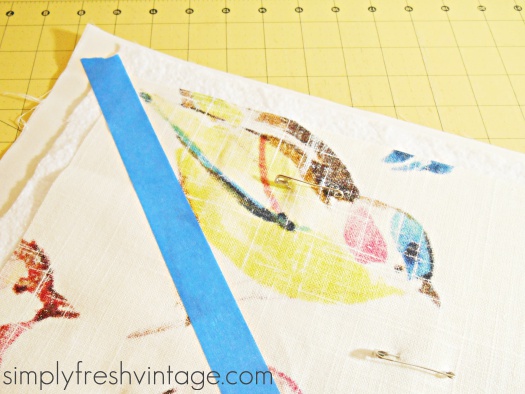
5. Cut out a 17″ x 17″ piece from your main fabric for your pillow front, an 18″ x 18″ piece of batting, and a 19″ x 19″ piece of solid lining fabric. Layer these together with the lining on the bottom, the batting in the middle, and your feature fabric on the top. I chose to use the back of the fabric as my right side for this pillow. I liked the lighter water-color affect it gave and it also allowed the bird applique to “pop.”

6. Using your safety pins, pin the lining, batting, and main fabric together. Tear off a piece of blue masking tape the length of the diagonal of the top fabric. Stick it to the fabric, lining one edge on the diagonal.
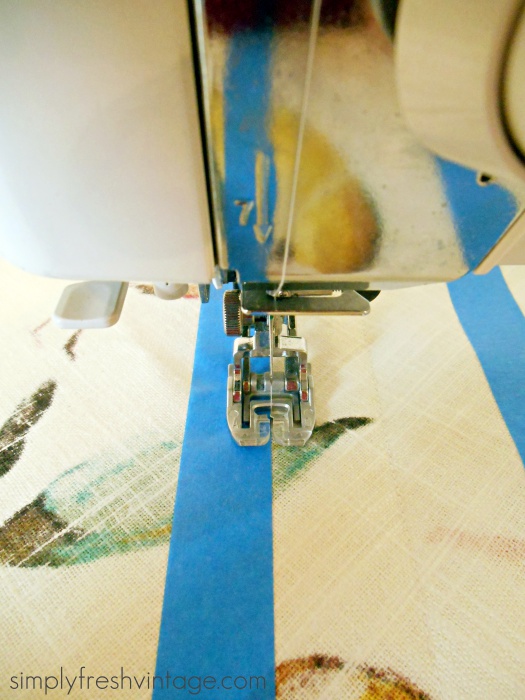
7. Take it to the machine and using the tape as a guide, stitch (without sewing on the tape.) Remove the tape and re-apply leaving 1-1/4″ between the first sewn line and the edge of the tape. You will notice that I used two pieces of tape, sett8ing it up to stitch both sides off the center. Remove your pins as you go.
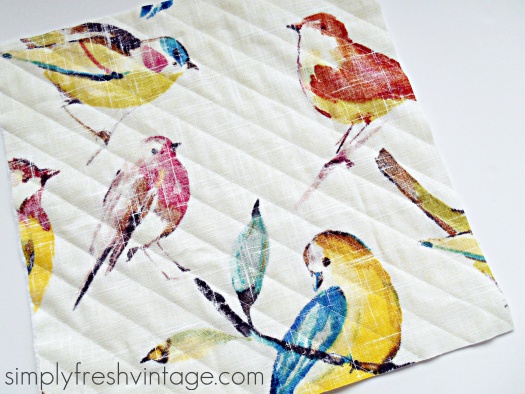
8. When you are done stitching, trim your pillow front to 16-1/2″ x 16-1/2″ square.
9. From the remaining feature fabric, cut out two pieces 17″ x 12″ for your pillow back envelope pieces, 2 pieces 18″ x 13″ of batting, and 19″ x 14″ of lining fabric. Repeat the instructions in steps 5, 6, and 7 to top stitch these pieces. Trim both to 16-1/2″ x 11″. Finish the edges of the two back pieces with 2-1/2″ strips of fabric folded in half. Sew the raw edges of the 2-1/2″ strip to the FRONT. Fold the fabric to the back side and hand-stitch closed. Make sure that you put the binding on one left side and one right side (watch the direction of the fabric.)

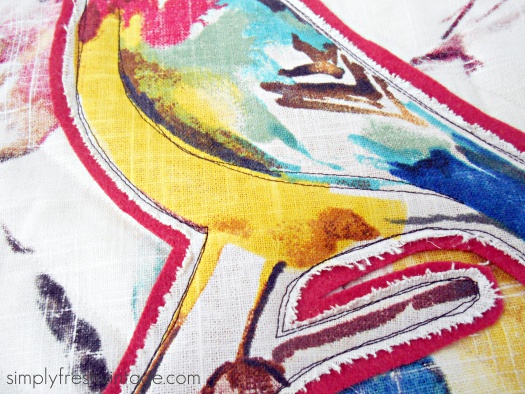
10. Pin your applique to the front of your pillow top.
11. Using dark brown or black thread, stitch around the outline of the bird, going around twice. IMPERFECTION IS THE KEY! You are not trying to stitch perfectly … it’s okay and desirable to “cross over” the first stitching when you come back around. You can also add a line of stitching to highlight the feathers. Be creative! Give your bird some dimension. Using your finger nail, “scratch” the edge of the bird applique to give it a ragged look.

12. Layer your three pieces, right sides together (watch the print direction). Stitch all the way around twice, back-stitching at corner and the two spots where the back overlaps. Go slowly over these spots as the fabric is very thick.


13. Trim the corners on the diagonal. Don’t get to close to the stitching, but cut enough of the bulk off.
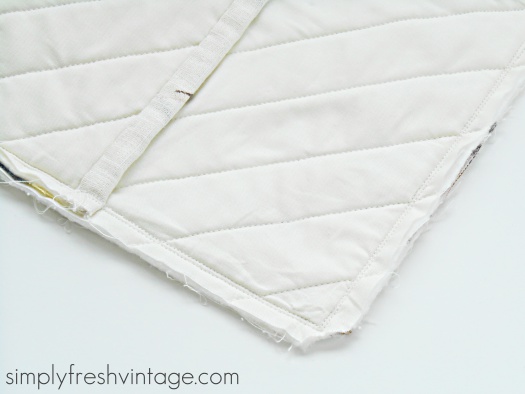
14. Turn your pillow cover inside and out, pushing the corner out. You might need to use the back end of a pen or another dull pointed object. Stuff the pillow insert into the pillow cover.


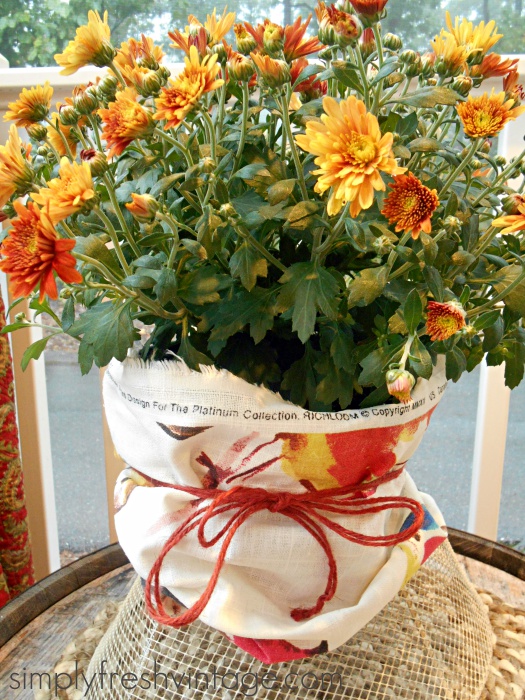
If you have any leftover fabric, you can use it as a coordinating flower pot cover. I love the look of the selvedge edge peeking out!
Wasn’t that easy! I love this fabric because it really can be used for every season. The fabric was very easy to work with and has a wonderful sheen. Following these directions will have you making a beautiful new pillow for your home in no time.

Before you go, please stop by and see all of the wonderful tips and ideas for pillow-making from my blogging friends. You will love each and every one of these!
[inlinkz_linkup id=456184 mode=1]
[inlinkz_linkup id=456185 mode=1]
[inlinkz_linkup id=456186 mode=1]
[inlinkz_linkup id=456187 mode=1]