Are you looking for an uncomplicated project for your Fall Decor? This Patchwork Pumpkin Pillow tutorial will have you sprucing up your Fall decor in no time.

Materials …
Enough background fabric prints to make 81 2-1/2″ squares (I used nine prints).
1/2 yard of fabric for back
1 yard of solid color fabric for lining
1/2 yard medium weight interfacing
1 yard of batting
An old sweater
Dark brown felt
Handful of polyester fiberfill
18″ x 18″ pillow insert
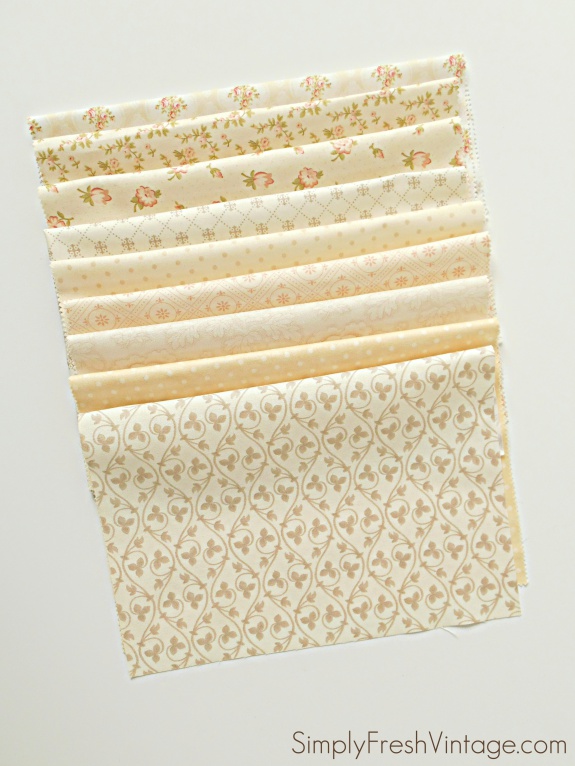
I chose nine neutral prints and cut 9 – 2-1/2″ squares from each print.
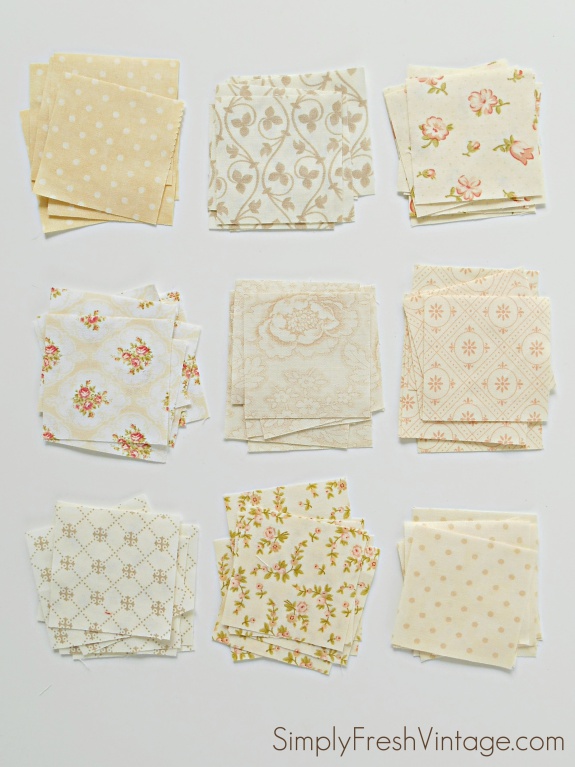
Arrange them randomly nine across by nine down.

Chain piece your squares together to make nine rows of nine patches.

Chain piece your rows together.
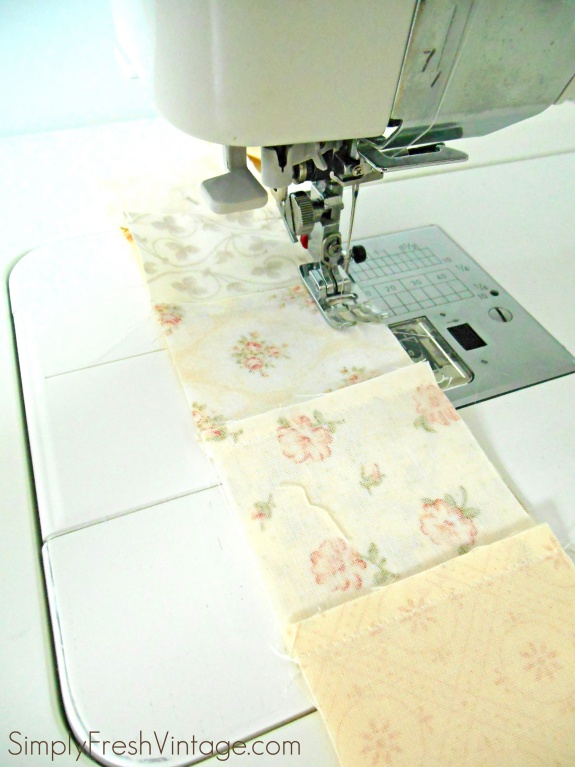

Sew your rows together.

Now you have a pretty patchwork top that should measure 18-1/2″ x 18-1/2″
Layer it with a piece of batting (19-1/2″ x 19-1/2″) and background fabric (20-1/2″ x 20-1/2″.)
Quilt as desired.

Trim to 18-1/2″ x 18-1/2″.
The back is envelope style, so you’re going to cut two pieces of fabric from your backing print (18-1/2″ x 13″), the batting (19-1/2″ x 14″) and your background lining (20-1/2″ x 15″).
Layer and quilt as desired. Trim to 18-1/2″ x 13″. Bind one 18-1/2″ side on each panel.

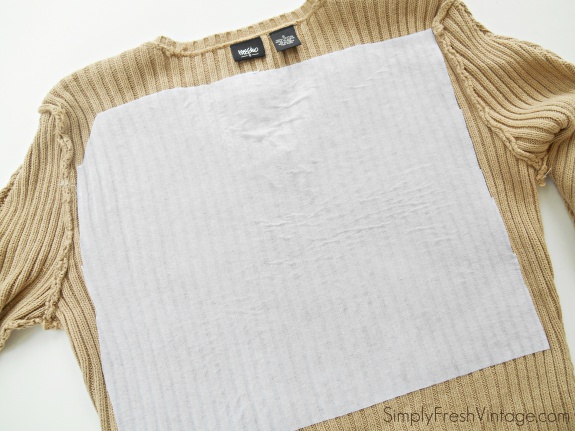
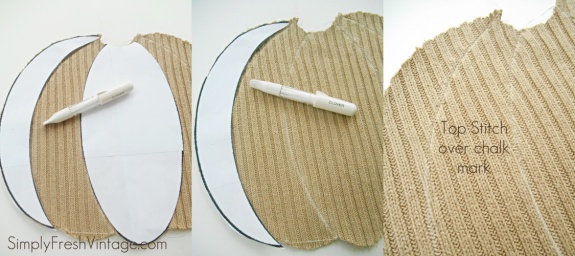
For the pumpkin, you’ll need an old sweater (mine was a thrift score find for $3), a pumpkin outline, and a piece of medium weight interfacing a little larger than the pumpkin.

Iron the interfacing to the inside of the sweater.
Pin the pumpkin outline to the interfacing, and cut out.


Cut out the pumpkin pattern in sections, lay on top of the pumpkin cutout, and trace the outlines with chalk. Top stitch over the chalk mark (so that you have a more permanent outline.)(
Pin in the center of the patchwork top.
Topstitch around the outside edge, leaving the center area open where the vine goes.
Lightly stuff with the polyester fiberfill.
Topstitch over the stitching you made previously, to give the pumpkin some texture.
Cut out the pumpkin top from a piece of dark brown felt.
Topstitch the outer edge and vertical lines as shown below.

To assemble, layer the backs and front, right sides together. Stitch all the way around. Fill with pillow insert.
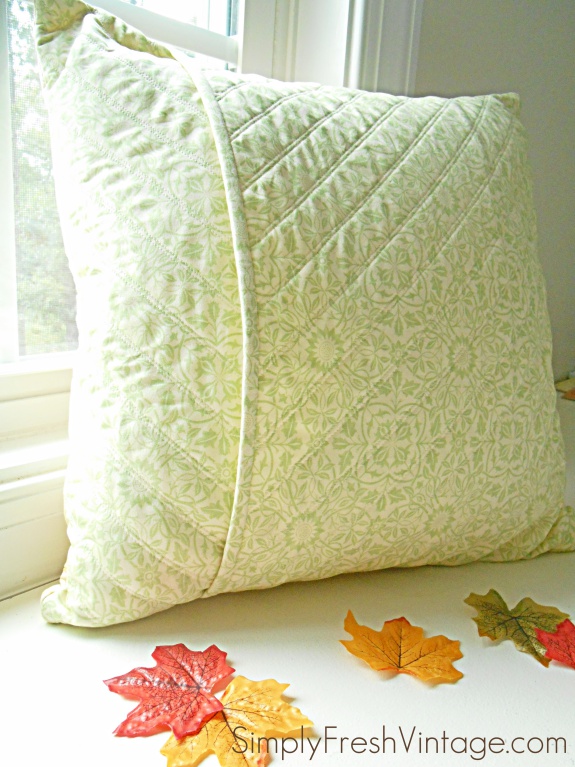
Enjoy your new pillow!

Another project that will brighten up your home is the Thankful Banner/Bunting that I made for our mantel.

– – – – – – – – – – – – – – – – – – – – – – – – – – – –

Our Southern Home • Artsy Chicks Rule • At Home with the Barkers
Cedar Hill Farmhouse • Knick of Time • Mrs. Hines Class
Unskinny Boppy • Shabby Art Boutique • Concord Cottage
Girl in the Garage • Fresh Idea Studio • Snazzy Little Things
White Lace Cottage • ME • Confessions of a Serial Do-it-Yourselfer
All things Heart and Home • House on the Way • Stone Gable Blog
Cupcakes and Crinoline • Postcards from the Ridge • Lilacs and Longhorns
Sweet Pea • Country Design Style • Petticoat Junktion
Restoration Redoux • What Meegan Makes • Prodigal Pieces