Last year I made a new “Thankful” banner / bunting for our fireplace. I had put up all of the “pretties,” but it was still missing something. So off I went to Michaels to see what inspired me. I came back with a few varieties of scrapbook paper and an idea. I wanted to combine my love for sewing with paper crafting, and at the same time add some fabric for texture. Before long I came up with a fairly simple plan. This tutorial will take you step-by-step through how to make this darling bunting. It can be customized for any holiday or occasion simply by switching out the paper and fabric options, and the letters. Once you get the first one under your belt, you’ll fly through the rest.

Bunting Materials:
- Scrapbook Paper … I used a heavier card stock for the base and a lighter weight print for the top.
- Fabric Scraps (I used a different fabric print for each letter)
- Two-sided fusible Wonder-Under
- Scissors (sharp)
- Glue stick or dual-sided scrapbook stickers
- Twine or ribbon
- Sewing Machine
- Template file (attached). Cut out the letters before starting.
Instructions are for one letter. Repeat for all other letters. Picture will follow instructions.
I’ve created a template and letter document for you to download for your personal use. You can either cut out and use the template, or follow the measurements for cutting the foundation and top paper. I’ve also included the letters for “THANKFUL” for you to use. Click on the picture below to open and save the document to your computer.

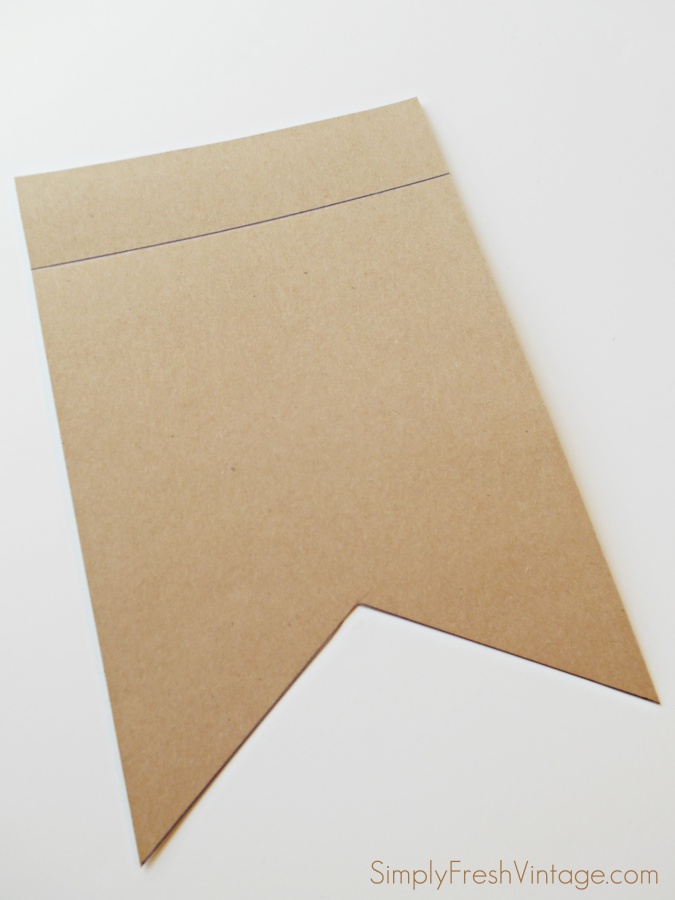
Step 1 … Cut the base 6″ x 9″. This should be a heavier card stock.

Step 2 … Draw a horizontal line 1-1/2″ down from the top. This is your score line. If you don’t have a scorer, you can press heavy a couple of times with a pencil to put an indent in the paper.

Step 3 … On the back, line up a ruler 3″ over and 2″ up from the bottom. Make a dot at the top right point of the ruler to find the center.
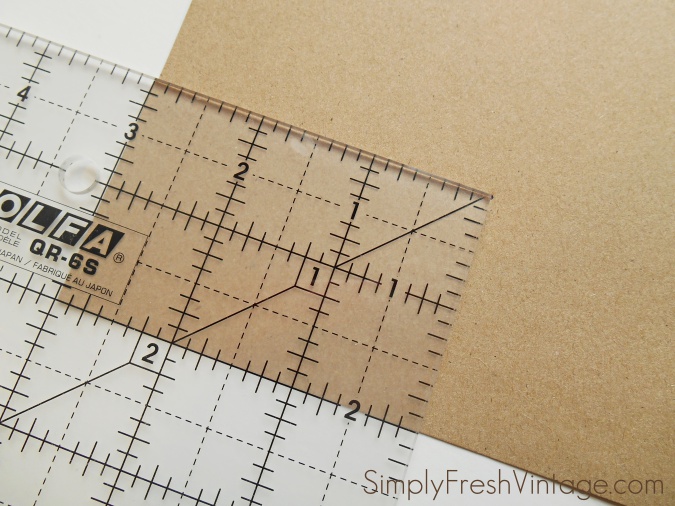
Step 4 … Draw lines from the bottom corners to the center dot.

Step 5 … Cut on the lines.
Step 6 … Cut your print paper 5″ wide by 6″ long.

Step 7 … On the back of the print paper, line up the ruler 2-1/2″ over and 1-3/4″ up from the bottom to mark your center dot. (If you are using a directional print, make sure you are marking the bottom.)
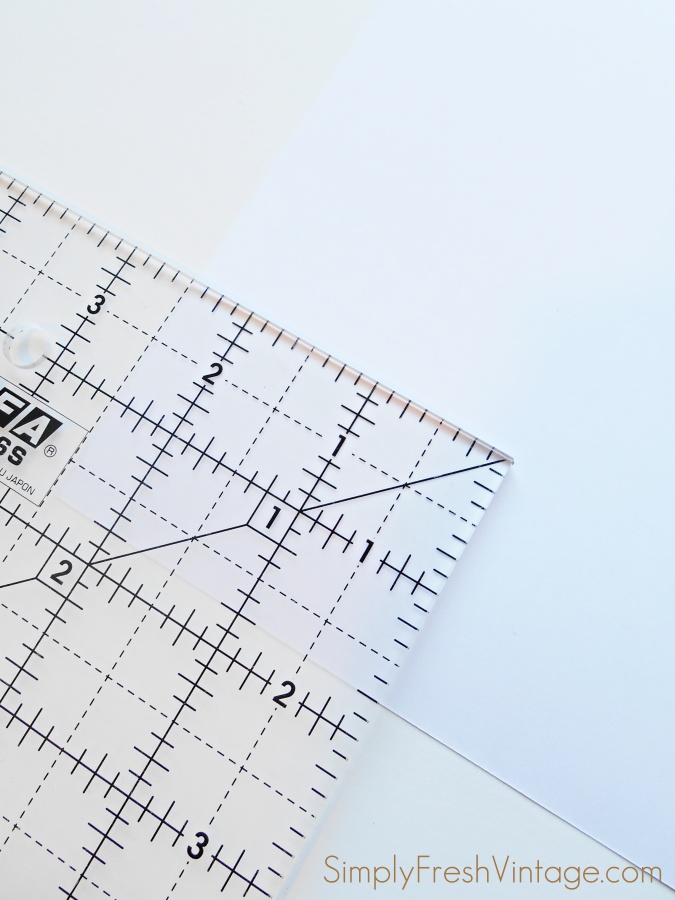
Step 8 … Draw lines from the bottom corners to the center dot.

Step 9 … Cut on the lines.

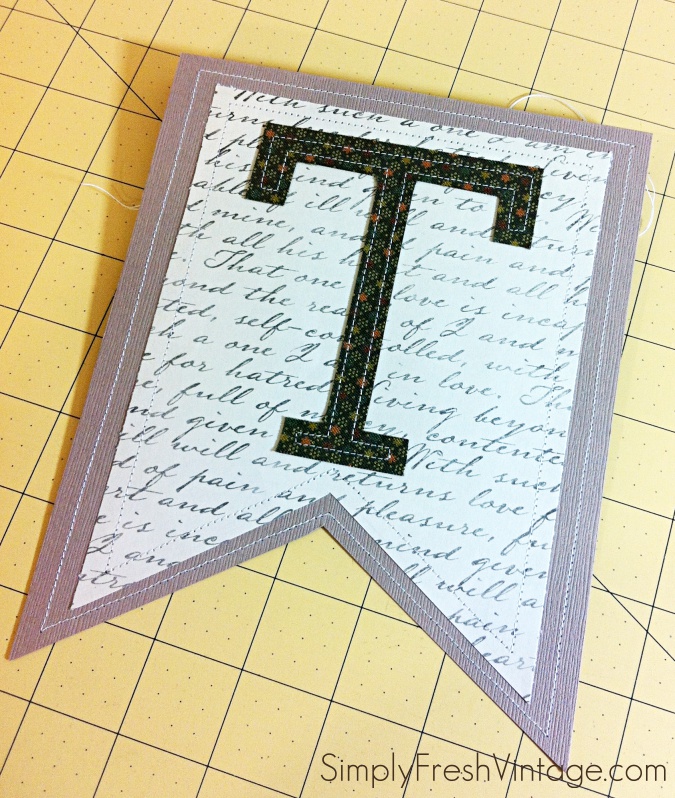
Step 10 … Using a glue stick or scrapbook stickies, adhere the printed paper to the foundation piece. Keep the glue away from the edges so that when you add the stitching the needle doesn’t get gummy.

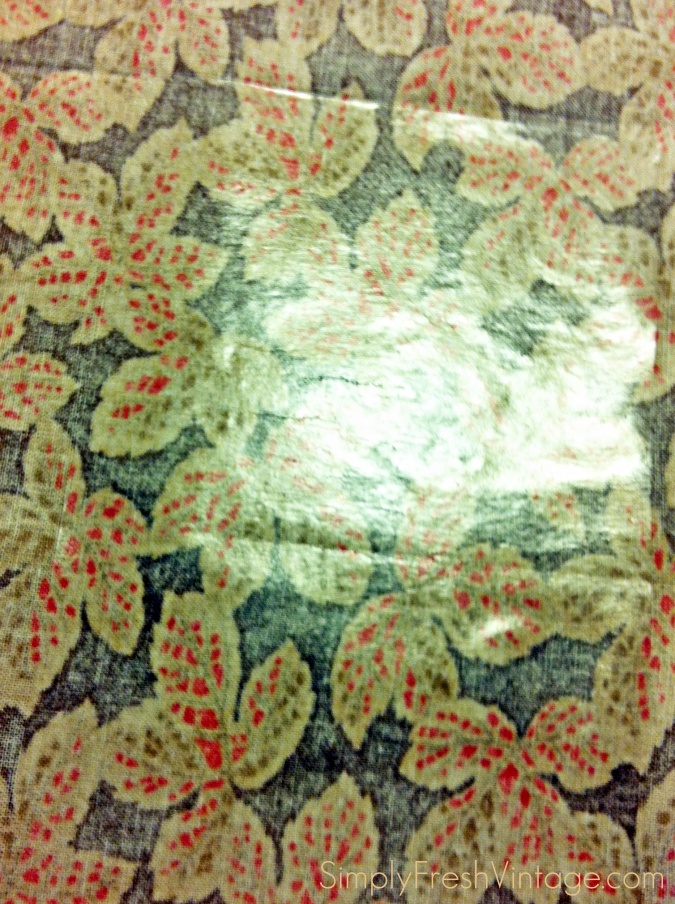
Step 11 … Cut out a piece of Wonder-Under about 4-1/4″ by 5″. Press it onto the back of a piece of fabric.

Step 12 … Let it cool for a minute, then peel away the paper. Set aside. Be careful not to set your iron directly on the Wonder-Under … you’ll have a mess!
Step 13 … Cut a piece of medium weight paper the same size as the Wonder-Under (about 4-1/4″ x 5″). This paper does not have to coordinate … it will not be seen. Trace one of the letters BACKWARDS onto the cardstock.

Step 14 … Lay the cardstock with the letter drawn over the Wonder-Under and press. This will give the fabric a little more stability which will aid in cutting.

Step 15 … Using sharp scissors, cut out the letter.
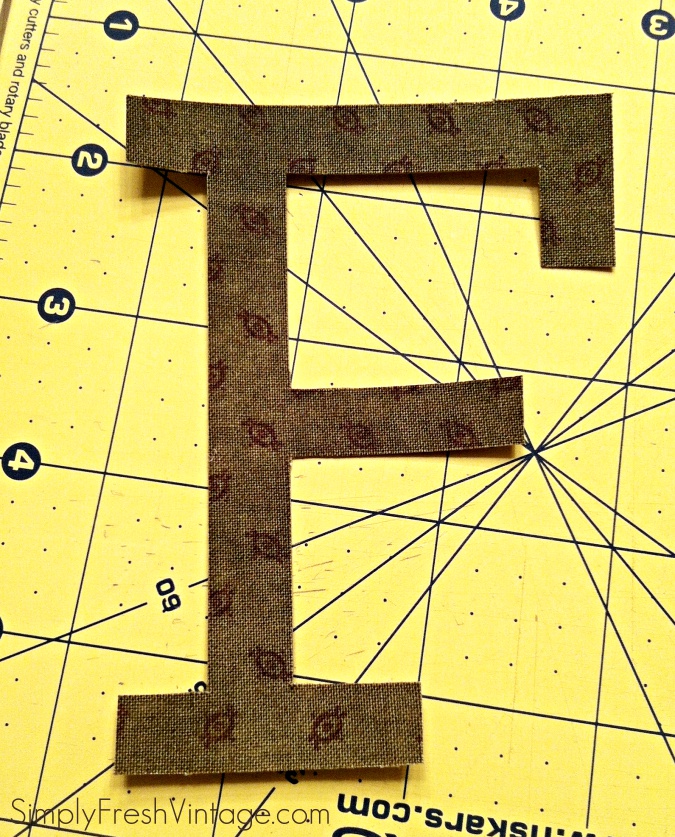
Step 16 … Using a glue stick or scrapbook stickies, center the letter and adhere it to the printed paper.
Step 17 … Take your banner over to your sewing machine and stitch around the foundation and around the printed paper, as shown above. Play with your stitch size on a scrap piece of paper to get the stitch length you desire. I basically eyeballed about 1/4″ from the outside edge of each.

Step 18 … Then stitch over the letter, about 1/8″ from the outside edge. When you get to the end of a segment, stop with your needle down, lift the lever, turn the banner, lower the level and continue.

Step 19 … Pull all threads to the back.

Step 20 … Tie them in a double knot and trim.

Step 21 … (pretending those threads aren’t there) Fold over the top and glue or tape down along the edge, leaving a pocket to string your twine or ribbon through. Repeat all steps for each letter.
Step 22 … When you’ve finished them all, run your twine or ribbon, and hang them where desired.

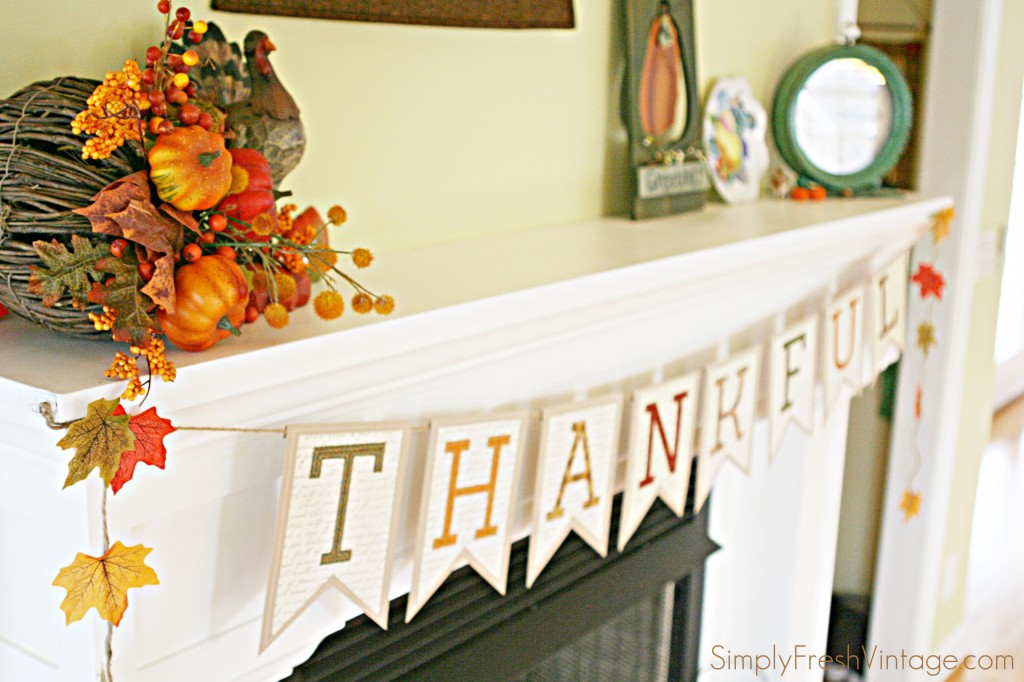
I hope you enjoyed this tutorial. If you have any questions, please feel free to ask in the comments. I hope you make your own “Thankful” banner / bunting. I’d love to see your pictures!
Here’s an amazing Fall Home Decor Tour filled with amazing projects that I know you will love!
